Hugo + Travis CI + Github pagesで独自ドメイン+HTTPSなWebページを公開する
きっかけ
自宅サーバをリプレースするにあたり,必要ないものはとことん外部サービスに突っ込んでいくことを検討しました.
所謂""脱オンプレ""を目指すにあたり,自身のWebページには下記の条件を満たすことを目標としました.
- 独自ドメインが使えること
- HTTPS対応であること
- Githubへのpushをトリガーに自動で公開が出来ること
- 静的サイトジェネレータを使用し,Markdownを書くだけで済むこと
- できるだけ安価に済ませること
これらを満たす方法をいくつか検討しましたが,最終的にGithub pagesが独自ドメインのHTTPSをサポートした*1ことにより,収束しました.
Hugoとは
Go言語製の静的サイトジェネレータです.
バイナリ一つで動くため依存が少なく,異なるプラットフォーム間でも手軽に導入でき,扱いやすいためです.
とにかくコンパイルが早く,あっという間に記事が生成されます.主にブログとかを書くのがメインなんですが,今回はシングルページの個人プロフィール的なサイトを運営します.
Travis CIを選んだ理由
いつものごとく,慣れているから,です.
今回のように複雑なテスト,特殊なビルド環境を必要としない場合,簡潔に書けてgithub pagesへのデプロイにも対応している点は魅力かなと思います.
Github Pagesとは
Githubでホストしている静的ファイルをWebサイトとして公開できる機能です.
基本的には {user名}.github.io/{リポジトリ名}で公開されますが,リポジトリ名を{user名}.github.ioとすると,{user名}.github.ioでページが公開されるようになります.
ただしこの場合masterブランチからしか公開できない設定になってしまい,CIによるビルド・デプロイと相性が悪い*2ので,別のリポジトリ名を設定します.今回は適当にwebとしました.
ページを作る
テーマの選択
からテーマを探します.どれもよく出来ていて,だいたいリポジトリの中にサンプルのconfig.tomlや.mdファイルが入っているので,それを参考に書いていきます.
hugoのインストール
公式の手順が公開されています.Macではbrewを,Windowsではchocolateyを推奨しているようです.Linuxではgo getしてビルドで使えるようになります.
また,Github Releasesで.debパッケージなども公開されているので,導入は難しくないと思います.
今回の環境は下記の通りですが,どのプラットフォームでもそれほどやることは変わらないだろうと思います.
サイトの作成
まずはhugoのプロジェクトの雛形を作成します.
$ hugo new site web
Congratulations! Your new Hugo site is created in /path/to/web

Just a few more steps and you're ready to go:

1. Download a theme into the same-named folder.
   Choose a theme from https://themes.gohugo.io/, or
   create your own with the "hugo new theme <THEMENAME>" command.
2. Perhaps you want to add some content. You can add single files
   with "hugo new <SECTIONNAME>/<FILENAME>.<FORMAT>".
3. Start the built-in live server via "hugo server".

Visit https://gohugo.io/ for quickstart guide and full documentation.
以下の様な感じのディレクトリが作成されます.
$ cd web
$ tree
.
├── archetypes
│   └── default.md
├── config.toml
├── content
├── data
├── layouts
├── static
└── themes
config.tomlで主な設定を変更し,content以下に.mdなどを作っていく感じになります.
テーマの追加
今回はこちらを採用
gitで管理するのでまずはプロジェクト直下で初期化します.
$ pwd
/path/to/web
$ git init
次に,テーマを追加するのですが,様々な手法があります.zipをダウンロードしてきて展開してもいいのですが,せっかくgitで管理されているテーマなので,submoduleとして追加します.
$ git submodule add https://github.com/sethmacleod/dimension themes/dimension
themesディレクトリ以下に追加するのがミソです.
$ tree -L 3
.
├── archetypes
│   └── default.md
├── config.toml
├── content
├── data
├── layouts
├── static
└── themes
    └── dimension
        ├── LICENSE.md
        ├── README.md
        ├── archetypes
        ├── exampleSite
        ├── images
        ├── layouts
        ├── static
        └── theme.toml
サンプルをコピーして編集
themes/dimension/exampleSite以下に,サンプルページのconfigやmdが入っています.これを元に編集するのが楽かなと思います.
$ cp -r themes/dimension/exampleSite/ ./
後はconfig.tomlを編集します.編集上の注意点は各テーマによって異なるのでここでは扱いません.リポジトリのREADME等をよく読んでください.
次にcontentディレクトリ以下のファイルを編集していきます.ここも各テーマにしたがってください.
プレビューする
文法が間違っていない限り,hugoでビルド・プレビューできます.
$ pwd
/path/to/web
$ hugo server

                   | EN | DE
+------------------+----+----+
  Pages            |  2 |  2
  Paginator pages  |  0 |  0
  Non-page files   |  0 |  0
  Static files     | 41 | 41
  Processed images |  0 |  0
  Aliases          |  1 |  1
  Sitemaps         |  2 |  1
  Cleaned          |  0 |  0

Total in 41 ms
Watching for changes in /path/to/{user名}.github.io/{content,data,layouts,static,themes}
Watching for config changes in /path/to/{user名}.github.io/config.toml
Serving pages from memory
Running in Fast Render Mode. For full rebuilds on change: hugo server --disableFastRender
Web Server is available at http://localhost:1313/ (bind address 127.0.0.1)
Press Ctrl+C to stop
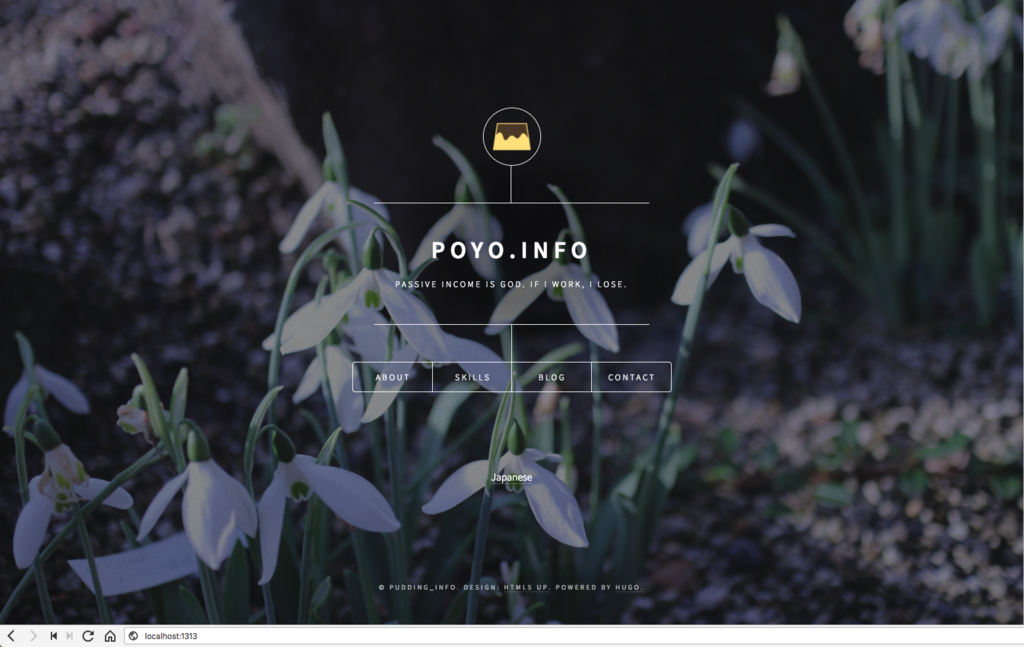
localhost:1313にアクセスするとページが表示されるはずです.
ビルドしてみる
プレビュー時にはビルドが行われないため,一度ビルドしてどうなるかを確かめておきましょう.
$ hugo

                   | EN | DE
+------------------+----+----+
  Pages            |  2 |  2
  Paginator pages  |  0 |  0
  Non-page files   |  0 |  0
  Static files     | 41 | 41
  Processed images |  0 |  0
  Aliases          |  1 |  1
  Sitemaps         |  2 |  1
  Cleaned          |  0 |  0

Total in 45 ms
publicディレクトリ以下にビルド後のファイルが格納されます.
$ ll public/
total 32
drwxr-xr-x  7 pudding  staff   224B Jun  7 14:29 css
drwxr-xr-x  5 pudding  staff   160B Jun  7 14:45 de
drwxr-xr-x  4 pudding  staff   128B Jun  7 14:45 en
drwxr-xr-x  8 pudding  staff   256B Jun  7 14:29 fonts
drwxr-xr-x  7 pudding  staff   224B Jun  7 14:32 images
-rw-r--r--  1 pudding  staff   5.6K Jun  7 14:45 index.html
drwxr-xr-x  6 pudding  staff   192B Jun  7 14:29 js
-rw-r--r--  1 pudding  staff    64B Jun  7 14:45 robots.txt
drwxr-xr-x  9 pudding  staff   288B Jun  7 14:29 sass
-rw-r--r--  1 pudding  staff   351B Jun  7 14:45 sitemap.xml
良い感じですね.
Github pagesへ自動デプロイする
リポジトリを作成してpush
特に解説しません.普通にwebというリポジトリを作成します.
$ git remote add origin https://github.com/{user名}/web
ビルド後のファイルはpushしたくないのでgitignoreに追加しておきます.
$ echo public/* >> .gitignore
後はaddしてcommitしてpush
$ git add .
$ git commit -m 'init'
$ git push -u origin master
Travis CIへ登録
別サイト様を参考に
Githubからトークンを取得
settingsを開き,Developer settings > Personal access tokens > Generate new token から新しいトークンを取得します.
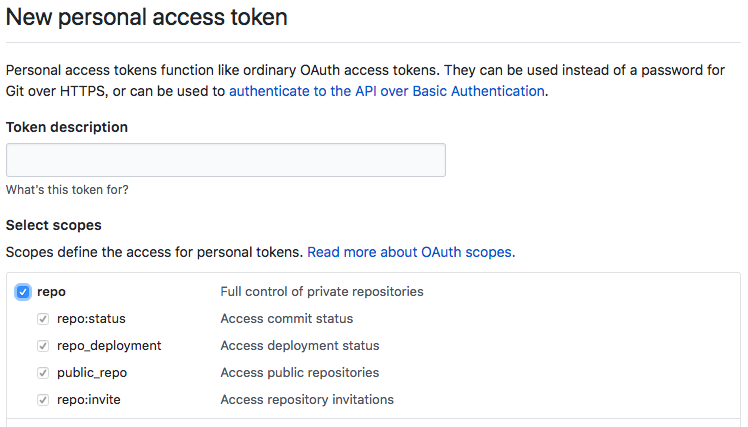
取得したTokenをTravis CIの該当リポジトリの環境変数に追加します.
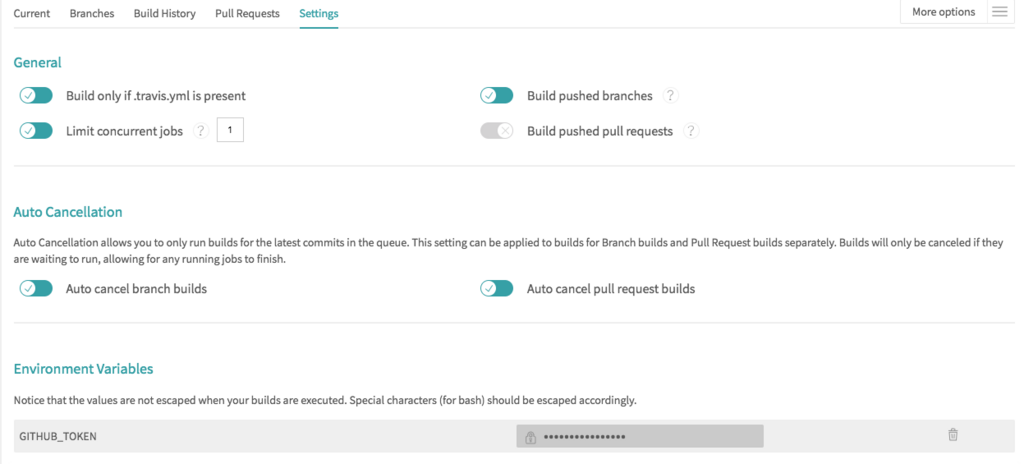
ついでに設定もしておきます.無駄にビルドが走っても仕方ないのでPull Request時の自動ビルドは止めておきます.
.travis.ymlを書く
よく内部でgit pushを叩いている例を見かけますが,Travis CIにはGithub Pagesへデプロイするための設定項目が存在します.
GitHub Pages Deployment - Travis CI
上記ページを参考に設定します.今回は別にgoを必要としませんが,一応goの環境を選択します.
language: go
dist: trusty

# これでdockerコンテナとして立ち上がるので起動が速い
sudo: false

env:
  # 良い方法が思い浮かばないのでバージョンを固定
  - HUGO_VERSION=0.41

# このセクションを挟まないと勝手にgo getを走らせようとしてこける
install: true

# .debパッケージをダウンロードしてインストール
before_script:
  - wget https://github.com/gohugoio/hugo/releases/download/v${HUGO_VERSION}/hugo_${HUGO_VERSION}_Linux-64bit.deb
  - sudo dpkg -i hugo_${HUGO_VERSION}_Linux-64bit.deb

# ビルドを実行
script:
  - hugo -v

# デプロイの設定
deploy:
  # github pages用のプロバイダを設定
  provider: pages
  # 公開するファイルがあるディレクトリを指定
  local-dir: public
  # scriptセクションで実行したビルド結果をそのまま残す
  skip-cleanup: true
  # githubから取得したpersonal access token
  github-token: $GITHUB_TOKEN
  # force pushせずにcommitを重ねる
  keep-history: true
  # masterブランチへのpush時のみに限る
  on:
    branch: master
branch切ってaddしてcommitしてpush
$ git checkout -b feature/auto-deployment
$ git add .travis.yml
$ git commit -m 'add .travis.yml'
$ git push origin feature/auto-deployment
ビルド結果を確認してグリーンならOKです.(何回か試していたのでcommitコメントが違うとか何回ビルドしているんだっていう指摘は無しで)

gh-pagesへpushされることを確認
masterブランチへのPull requestを作成してマージします.
うまく設定できれいればmasterブランチでCIが動き,デプロイが実行されます.
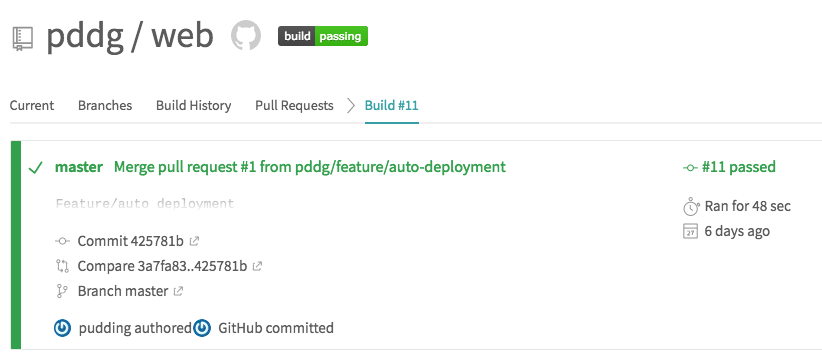
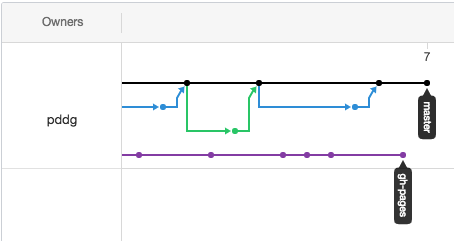
こんな感じでmasterから完全に独立したgh-pagesブランチが作れられます(何度かpushしている例です).
公開されているか確認
https://{user名}.github.io/web/にアクセスして表示されればOK
表示が崩れる場合,cssやjsを正しく読み込めていない可能性があります.
config.tomlに設定を書きましょう.
baseurl = "http://{user名}.github.io/web/"
canonifyurls = true
独自ドメインのセットアップ
だいたいここに書いてます.
Using a custom domain with GitHub Pages - User Documentation
CNAMEレコードの設定
適当にドメイン名をexample.comとしておきます.今回はwww.example.comでWebページを公開します.
DNSの設定をします.今回は例としてお名前ドットコムを上げますが,どこでも基本は変わらないでしょう.
| ホスト名 | Type | TTL | Value |
|---|---|---|---|
www.example.com |
CNAME | 3600 | {user名}.github.io |
もしexample.comでもページを表示したい場合,Aレコードを設定するのでは無く,URL転送機能などを使ってexample.comへのアクセスをwww.example.comへ転送しましょう.独自ドメインでhttpsを利用する場合,githubは自動でexample.comとwww.example.comでリダイレクトしてくれません*3.
Github Pagesのカスタムドメインを設定
$ git checkout master
$ git pull
$ git checkout -b feature/custom_domain
Webから叩いても良いですが,Travis CIのGithub pages deployにはカスタムドメインの設定項目がありますのでそっちからやりましょう..travis.ymlを編集します.
# デプロイの設定
deploy:
  # 独自ドメインを設定
  fqdn: www.example.com
  provider: pages
  local-dir: public
  skip-cleanup: true
  github-token: $GITHUB_TOKEN
  keep-history: true
  on:
    branch: master
config.tomlも設定します.
baseurl = "https://www.example.com/"
pushしてPull requestを発行します.
$ git push origin feature/custom_domain
マージして変更が反映されるのを確認します.
カスタムドメインでのアクセスを確認
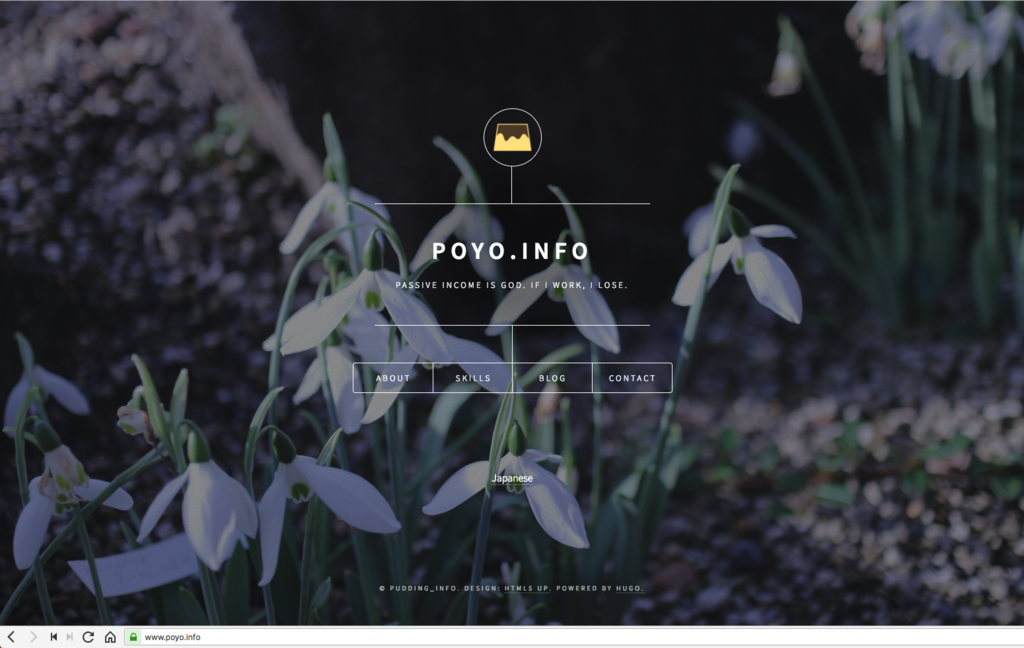
上手くいっていれば数分でhttps://www.example.com/にアクセスすることでページが見れるようになるはずですが,うまくいかないこともあります.
Enforces HTTPSの設定がいつまでもグレーアウトし,証明書の発行がされていない旨の警告が出る場合は一度ドメインを削除して再設定する必要があります*4
よくヘルプを読みましょう…
まとめ
自分でWebサーバーをホストすることなくWebサイトを公開する手法はこれまでもいくつかありましたが,HTTPS+独自ドメインが使えて,最小構成ではgithubに閉じて運用できることはメリットかなと思います.
みんな良い感じにページを公開していきましょう!
*2:ビルド後の成果物をmasterブランチへpushするため,手元の環境で毎回pullしないといけなかったり,masterブランチで無駄にdiffが発生してしまうため
*3:Setting up an apex domain and www subdomain - User Documentation
*4:Adding or removing a custom domain for your GitHub Pages site - User Documentation
Django 2.0 + Channels 2.1 でチュートリアルやっていく(3)
前回のおさらい
前回は実際にWebSocketでチャットを実装しました.が,実はあのconsumerは同期的に動いていたため,今回は非同期で書き直します.
Tutorial Part 3: Rewrite Chat Server as Asynchronous
consumerを非同期に書き直す
同期的に動作することの
- メリット
- Djangoモデルへのアクセスについて,特にコード追加せずに可能
- デメリット
- パフォーマンスが低くなる
非同期的に動作することについてはこれらのメリット,デメリットの逆が言えます.データベースアクセスを伴うような動作においてはasgiref.sync.sync_to_asyncやchannels.db.database_sync_to_asyncなどを使用することで非同期処理に変更できますが,パフォーマンスの向上は完全にネイティブな非同期処理と比べると劣ります.
今回のChatConsumerはデータベースアクセスを伴わないため,完全に非同期に書き直すことが出来ます.
from channels.generic.websocket import AsyncWebsocketConsumer
import json

class ChatConsumer(AsyncWebsocketConsumer):
    async def connect(self):
        self.room_name = self.scope['url_route']['kwargs']['room_name']
        # 元のコードは→self.room_group_name = 'chat_%s' % self.room_name
        self.room_group_name = 'chat_{}'.format(self.room_name)

        # Join room group
        await self.channel_layer.group_add(
            self.room_group_name,
            self.channel_name
        )

        await self.accept()

    async def disconnect(self, close_code):
        # Leave room group
        await self.channel_layer.group_discard(
            self.room_group_name,
            self.channel_name
        )

    # Receive message from WebSocket
    async def receive(self, text_data):
        text_data_json = json.loads(text_data)
        message = text_data_json['message']

        # Send message to room group
        await self.channel_layer.group_send(
            self.room_group_name,
            {
                'type': 'chat_message',
                'message': message
            }
        )

    # Receive message from room group
    async def chat_message(self, event):
        message = event['message']

        # Send message to WebSocket
        await self.send(text_data=json.dumps({
            'message': message
        }))
変更点としては
ChatConsumerの継承元がWebsocketConsumerからAsyncWebsocketConsumerに- Python3.5から導入された
async/awaitを用いたIO周りの非同期化*1 async_to_syncは必要なくなったので削除
といった感じです.このように完全非同期処理で書くことができ,パフォーマンスが向上します,
runserverして動作するかを確かめます.
$ python manage.py runserver
またタブを複数開いて実行してみます(前回と同様なので省略).
このチュートリアルを書いた人はもう少し各章のバランスを取った方がいいと思います(笑) 次回,チュートリアル最後のPart4に続きます.
Django 2.0 + Channels 2.1 でチュートリアルやっていく(2)
前回のおさらい
前回は簡単なプロジェクトのセットアップで終わっていました.これから実際にWebSocketを捌く実装をやっていくことになります.
Tutorial Part 2: Implement a Chat Server
chat roomのviewを書く
chat/templates/room.htmlを作成します.下記コードをコピペでOKです.
<!DOCTYPE html>
<html>
<head>
    <meta charset="utf-8"/>
    <title>Chat Room</title>
</head>
<body>
    <textarea id="chat-log" cols="100" rows="20"></textarea><br/>
    <input id="chat-message-input" type="text" size="100"/><br/>
    <input id="chat-message-submit" type="button" value="Send"/>
</body>
<script>
    var roomName = {{ room_name_json }};

    var chatSocket = new WebSocket(
        'ws://' + window.location.host +
        '/ws/chat/' + roomName + '/');

    chatSocket.onmessage = function(e) {
        var data = JSON.parse(e.data);
        var message = data['message'];
        document.querySelector('#chat-log').value += (message + '\n');
    };

    chatSocket.onclose = function(e) {
        console.error('Chat socket closed unexpectedly');
    };

    document.querySelector('#chat-message-input').focus();
    document.querySelector('#chat-message-input').onkeyup = function(e) {
        if (e.keyCode === 13) {  // enter, return
            document.querySelector('#chat-message-submit').click();
        }
    };

    document.querySelector('#chat-message-submit').onclick = function(e) {
        var messageInputDom = document.querySelector('#chat-message-input');
        var message = messageInputDom.value;
        chatSocket.send(JSON.stringify({
            'message': message
        }));

        messageInputDom.value = '';
    };
</script>
</html>
簡単にコードを読むとjavascriptでWebSocketクライアントを生成し,メッセージの送信を行おうとしていることがわかります.
次にこれを返すviewをchat/views.pyに定義します.
from django.shortcuts import render
from django.utils.safestring import mark_safe
import json


def index(request):
    return render(request, 'chat/index.html', {})


def room(request, room_name):
    return render(request, 'chat/room.html', {
        'room_name_json': mark_safe(json.dumps(room_name))
    })
chat/urls.pyへルーティングを追加します.
from django.urls import path
from . import views


urlpatterns = [
    path('', views.index, name='index'),
    # チュートリアルの元コードは→url(r'^(?P<room_name>[^/]+)/$', views.room, name='room'),
    path('<slug:room_name>/', views.room, name='room'),
]
動かしてみます.
$ python manage.py runserver
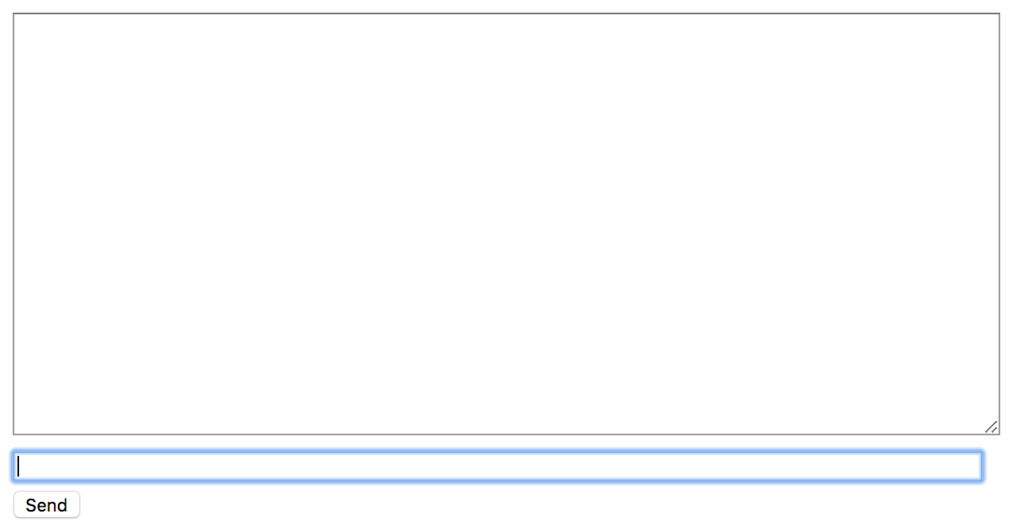
127.0.0.1:8000/chat/lobby/へアクセスしてみます.このlobbyというのはチャットルームの名前になります(なんでもいい).
以下の様なページが表示されます.
またコンソールに下記の様なエラーが出ます.これは想定内のエラーです.
[2018/05/11 00:04:55] HTTP GET /chat/lobby/ 200 [0.03, 127.0.0.1:63086]
2018-05-11 00:04:55,440 - ERROR - ws_protocol - [Failure instance: Traceback: <class 'ValueError'>: No application configured for scope type 'websocket'
/Users/pudding/ghq/github.com/pddg/channels_tutorial1/env/lib/python3.6/site-packages/twisted/internet/defer.py:500:errback
/Users/pudding/ghq/github.com/pddg/channels_tutorial1/env/lib/python3.6/site-packages/twisted/internet/defer.py:567:_startRunCallbacks
/Users/pudding/ghq/github.com/pddg/channels_tutorial1/env/lib/python3.6/site-packages/twisted/internet/defer.py:653:_runCallbacks
/Users/pudding/ghq/github.com/pddg/channels_tutorial1/env/lib/python3.6/site-packages/twisted/internet/defer.py:1442:gotResult
--- <exception caught here> ---
/Users/pudding/ghq/github.com/pddg/channels_tutorial1/env/lib/python3.6/site-packages/twisted/internet/defer.py:1384:_inlineCallbacks
/Users/pudding/ghq/github.com/pddg/channels_tutorial1/env/lib/python3.6/site-packages/twisted/python/failure.py:422:throwExceptionIntoGenerator
/Users/pudding/ghq/github.com/pddg/channels_tutorial1/env/lib/python3.6/site-packages/daphne/server.py:186:create_application
/Users/pudding/ghq/github.com/pddg/channels_tutorial1/env/lib/python3.6/site-packages/twisted/python/threadpool.py:250:inContext
/Users/pudding/ghq/github.com/pddg/channels_tutorial1/env/lib/python3.6/site-packages/twisted/python/threadpool.py:266:<lambda>
/Users/pudding/ghq/github.com/pddg/channels_tutorial1/env/lib/python3.6/site-packages/twisted/python/context.py:122:callWithContext
/Users/pudding/ghq/github.com/pddg/channels_tutorial1/env/lib/python3.6/site-packages/twisted/python/context.py:85:callWithContext
/Users/pudding/ghq/github.com/pddg/channels_tutorial1/env/lib/python3.6/site-packages/channels/staticfiles.py:41:__call__
/Users/pudding/ghq/github.com/pddg/channels_tutorial1/env/lib/python3.6/site-packages/channels/routing.py:58:__call__
]
Exception in callback AsyncioSelectorReactor.callLater.<locals>.run() at /Users/pudding/ghq/github.com/pddg/channels_tutorial1/env/lib/python3.6/site-packages/twisted/internet/asyncioreactor.py:287
handle: <TimerHandle when=253833.004511811 AsyncioSelectorReactor.callLater.<locals>.run() at /Users/pudding/ghq/github.com/pddg/channels_tutorial1/env/lib/python3.6/site-packages/twisted/internet/asyncioreactor.py:287>
Traceback (most recent call last):
  File "/usr/local/var/pyenv/versions/3.6.0/Python.framework/Versions/3.6/lib/python3.6/asyncio/events.py", line 126, in _run
    self._callback(*self._args)
  File "/Users/pudding/ghq/github.com/pddg/channels_tutorial1/env/lib/python3.6/site-packages/twisted/internet/asyncioreactor.py", line 290, in run
    f(*args, **kwargs)
  File "/Users/pudding/ghq/github.com/pddg/channels_tutorial1/env/lib/python3.6/site-packages/twisted/internet/tcp.py", line 289, in connectionLost
    protocol.connectionLost(reason)
  File "/Users/pudding/ghq/github.com/pddg/channels_tutorial1/env/lib/python3.6/site-packages/autobahn/twisted/websocket.py", line 128, in connectionLost
    self._connectionLost(reason)
  File "/Users/pudding/ghq/github.com/pddg/channels_tutorial1/env/lib/python3.6/site-packages/autobahn/websocket/protocol.py", line 2467, in _connectionLost
    WebSocketProtocol._connectionLost(self, reason)
  File "/Users/pudding/ghq/github.com/pddg/channels_tutorial1/env/lib/python3.6/site-packages/autobahn/websocket/protocol.py", line 1096, in _connectionLost
    self._onClose(self.wasClean, WebSocketProtocol.CLOSE_STATUS_CODE_ABNORMAL_CLOSE, "connection was closed uncleanly (%s)" % self.wasNotCleanReason)
  File "/Users/pudding/ghq/github.com/pddg/channels_tutorial1/env/lib/python3.6/site-packages/autobahn/twisted/websocket.py", line 171, in _onClose
    self.onClose(wasClean, code, reason)
  File "/Users/pudding/ghq/github.com/pddg/channels_tutorial1/env/lib/python3.6/site-packages/daphne/ws_protocol.py", line 146, in onClose
    self.application_queue.put_nowait({
AttributeError: 'WebSocketProtocol' object has no attribute 'application_queue'
ブラウザのコンソールにも下記の様なエラーが出ているかと思います*1.
WebSocket connection to 'ws://127.0.0.1:8000/ws/chat/lobby/' failed: Error during WebSocket handshake: net::ERR_CONNECTION_RESET
Consumerを書く
DjangoがHttpリクエストを受け,urlの設定を元にview関数を呼び出してリクエストを処理するように,channelsはWebSocketのコネクションを受け入れると,consumerを呼び出しイベントを処理します.
今回は非常に簡単な,送られてきた文字列をオウム返しするだけのconsumerを作成します.
chat/consumers.pyを作成します.
from channels.generic.websocket import WebsocketConsumer
import json

class ChatConsumer(WebsocketConsumer):
    def connect(self):
        self.accept()

    def disconnect(self, close_code):
        pass

    def receive(self, text_data):
        text_data_json = json.loads(text_data)
        message = text_data_json['message']

        self.send(text_data=json.dumps({
            'message': message
        }))
WebsocketConsumerというそのものズバリなクラスを継承し,独自のconsumerを作成します.
receive()で送られてくるjson形式の文字列を処理して中からmessageを取り出し,またjsonに埋め込んで返します.簡単な作りです.
次にchat/routing.pyを新しく作り,以下の様に記述します.
from django.urls import path
from . import consumers


websocket_urlpatterns = [
    # 元のコードは→url(r'^ws/chat/(?P<room_name>[^/]+)/$', consumers.ChatConsumer),
    path('ws/chat/<slug:room_name>/', consumers.ChatConsumer),
]
更に,前回作成しておいたchannels_tutorial1/routing.pyも下記の様に編集します.
from channels.auth import AuthMiddlewareStack
from channels.routing import ProtocolTypeRouter, URLRouter
from chat import routing

application = ProtocolTypeRouter({
    # (http->django views is added by default)
    'websocket': AuthMiddlewareStack(
        URLRouter(
            routing.websocket_urlpatterns
        )
    ),
})
このとき,ProtocolTypeRouterはサーバへのアクセスのプロトコルを見て,websocketであればAuthMiddlewareStackに接続を投げます.
AuthMiddlewareStackはAuthenticationMiddlewareのような働きをし,認証ユーザへの参照を付与します.その後URLRouterへ渡され,これが接続するパスを見てルーティングするconsumerを決めます.
ではここで動かして確認してみます.
$ python manage.py runserver
同じくhttp://127.0.0.1:8000/chat/lobbyにアクセスし,適当にメッセージを打って送ります.例ではhogeとかfugaとかpiyoとか送ったときの図です.
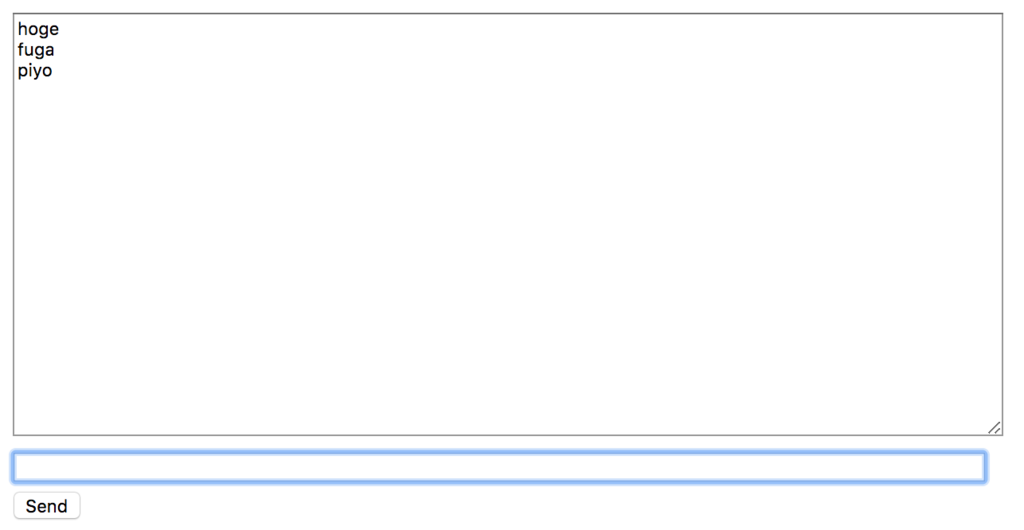
わーい!返ってきた〜〜〜
しかし,別のタブを開いて同じチャットルームを開いても,タブ間でのやりとりはまだできません.これを実行可能にするためにchannel layerを使用します.
channel layerを有効化する
channel layerはconsumerのインスタンスが互いに,またはDjangoのオブジェクトと通信できるようにする一種の通信システムです,channel layerは下記の様な事象を抽象化します.
- channel.メッセージボックスのようなもので,名前が付けられている.名前を持つ人はここにメッセージを送信できる.
- group.これは関連するchannelの集まりで,同じように名前が付けられている,名前を持つ人はこのgroupに自由にchannelを追加し,全てのchannelにメッセージを送信できる.
consumerインスタンスはそれぞれ一意な名前が自動生成されており,channel layerで互いに通信できるようになっています.
このchannel layerのバックエンドにRedisを使用します.チュートリアルではdockerでredisサーバを起動していますが,起動できれば何でも良いと思います*2.
$ docker run -d -p 6379:6379 redis
channelsでredisを扱うためのパッケージを導入します.
$ pip install channels_redis
settings.pyにchannel backendの設定を記述します.
CHANNEL_LAYERS = {
    'default': {
        'BACKEND': 'channels_redis.core.RedisChannelLayer',
        'CONFIG': {
            "hosts": [('127.0.0.1', 6379)],
        },
    },
}
- Redisサーバが起動
- ChannelバックエンドにRedisを指定
までできれば,簡単にコマンドラインで動作を確かめます.
$ python manage.py shell
>>> import channels.layers
>>> channel_layer = channels.layers.get_channel_layer()
>>> from asgiref.sync import async_to_sync
>>> async_to_sync(channel_layer.send)('test_channel', {'type': 'hello'})
>>> async_to_sync(channel_layer.receive)('test_channel')
{'type': 'hello'}
このとき,例えば一度receiveした後に再びreceiveすると入力されるまで待ちます(Control+Cで終了します).
確認が出来たところでconsumerを書き直し,consumerのインスタンス間で通信できるようにします.
from asgiref.sync import async_to_sync
from channels.generic.websocket import WebsocketConsumer
import json


class ChatConsumer(WebsocketConsumer):

    def connect(self):
        self.room_name = self.scope['url_route']['kwargs']['room_name']
        # 元のコードは→self.room_group_name = 'chat_%s' % self.room_name
        self.room_group_name = 'chat_{}'.format(self.room_name)

        # Join room group
        async_to_sync(self.channel_layer.group_add)(
            self.room_group_name,
            self.channel_name
        )

        self.accept()

    def disconnect(self, close_code):
        # Leave room group
        async_to_sync(self.channel_layer.group_discard)(
            self.room_group_name,
            self.channel_name
        )

    # Receive message from WebSocket
    def receive(self, text_data, **kwargs):
        text_data_json = json.loads(text_data)
        message = text_data_json['message']

        # Send message to room group
        async_to_sync(self.channel_layer.group_send)(
            self.room_group_name,
            {
                'type': 'chat_message',
                'message': message
            }
        )

    # Receive message from room group
    def chat_message(self, event):
        message = event['message']

        # Send message to WebSocket
        self.send(text_data=json.dumps({
            'message': message
        }))
cunsumerインスタンスは作成時に接続されてきたURLのパスに従ってグループに所属し,グループ内でインスタンス間のメッセージ送受信が出来るようになります.
サーバを起動して確かめます.
$ python manage.py runserver
ブラウザのタブを2つ並べて開き,メッセージを送信します.どちらの画面にも応答が返ってくることが分かります.
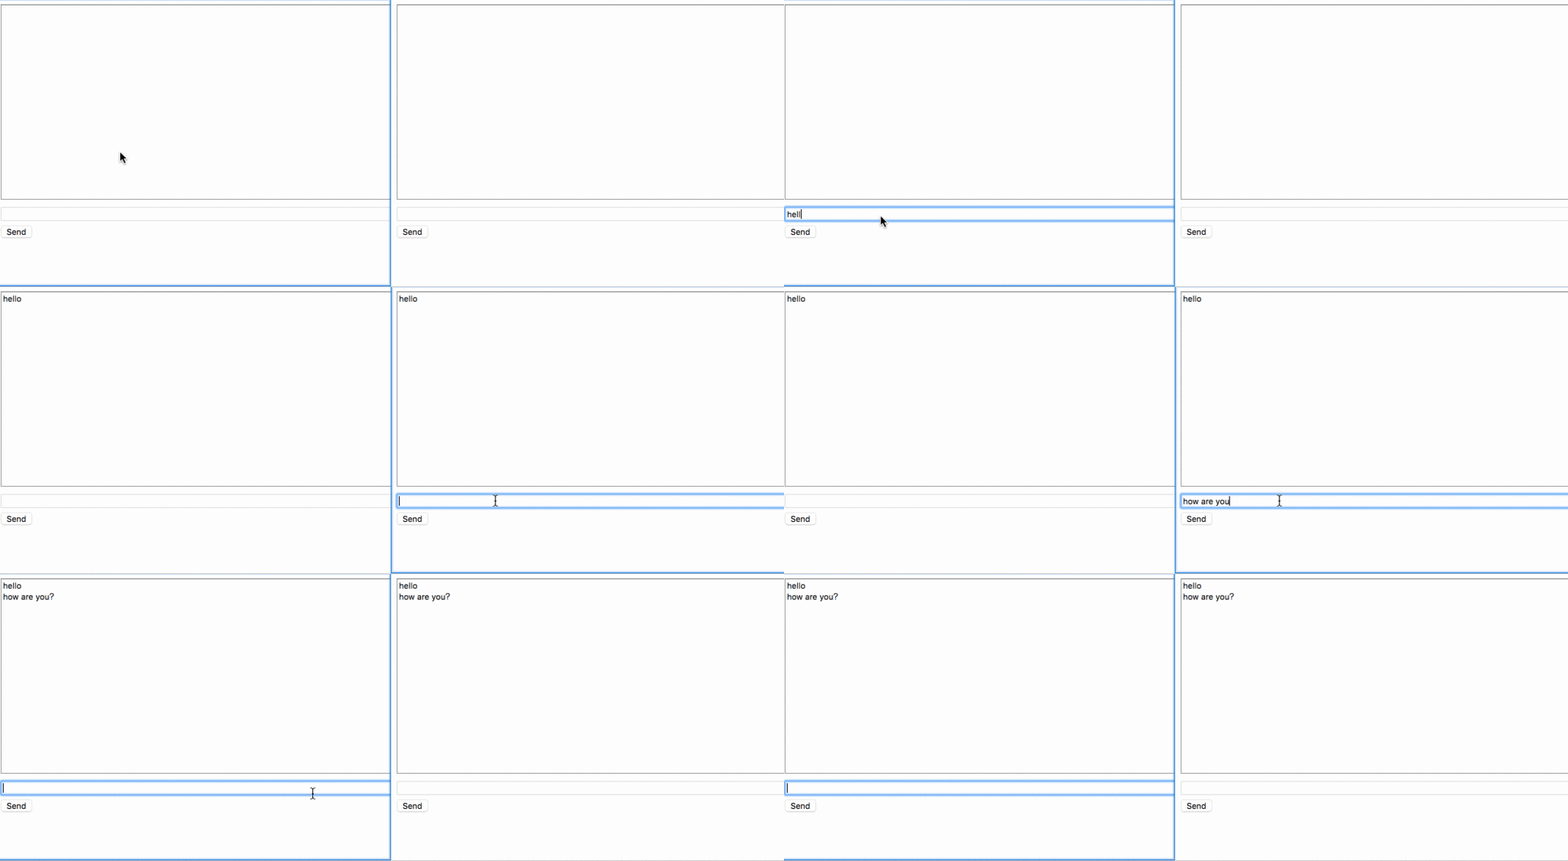
だんだんWebSocketをやっているという気持ちになってきましたね.次はPart3です.