Django 2.0 + Channels 2.1 でチュートリアルやっていく(2)
前回のおさらい
前回は簡単なプロジェクトのセットアップで終わっていました.これから実際にWebSocketを捌く実装をやっていくことになります.
Tutorial Part 2: Implement a Chat Server
chat roomのviewを書く
chat/templates/room.htmlを作成します.下記コードをコピペでOKです.
<!DOCTYPE html>
<html>
<head>
    <meta charset="utf-8"/>
    <title>Chat Room</title>
</head>
<body>
    <textarea id="chat-log" cols="100" rows="20"></textarea><br/>
    <input id="chat-message-input" type="text" size="100"/><br/>
    <input id="chat-message-submit" type="button" value="Send"/>
</body>
<script>
    var roomName = {{ room_name_json }};

    var chatSocket = new WebSocket(
        'ws://' + window.location.host +
        '/ws/chat/' + roomName + '/');

    chatSocket.onmessage = function(e) {
        var data = JSON.parse(e.data);
        var message = data['message'];
        document.querySelector('#chat-log').value += (message + '\n');
    };

    chatSocket.onclose = function(e) {
        console.error('Chat socket closed unexpectedly');
    };

    document.querySelector('#chat-message-input').focus();
    document.querySelector('#chat-message-input').onkeyup = function(e) {
        if (e.keyCode === 13) {  // enter, return
            document.querySelector('#chat-message-submit').click();
        }
    };

    document.querySelector('#chat-message-submit').onclick = function(e) {
        var messageInputDom = document.querySelector('#chat-message-input');
        var message = messageInputDom.value;
        chatSocket.send(JSON.stringify({
            'message': message
        }));

        messageInputDom.value = '';
    };
</script>
</html>
簡単にコードを読むとjavascriptでWebSocketクライアントを生成し,メッセージの送信を行おうとしていることがわかります.
次にこれを返すviewをchat/views.pyに定義します.
from django.shortcuts import render
from django.utils.safestring import mark_safe
import json


def index(request):
    return render(request, 'chat/index.html', {})


def room(request, room_name):
    return render(request, 'chat/room.html', {
        'room_name_json': mark_safe(json.dumps(room_name))
    })
chat/urls.pyへルーティングを追加します.
from django.urls import path
from . import views


urlpatterns = [
    path('', views.index, name='index'),
    # チュートリアルの元コードは→url(r'^(?P<room_name>[^/]+)/$', views.room, name='room'),
    path('<slug:room_name>/', views.room, name='room'),
]
動かしてみます.
$ python manage.py runserver
127.0.0.1:8000/chat/lobby/へアクセスしてみます.このlobbyというのはチャットルームの名前になります(なんでもいい).
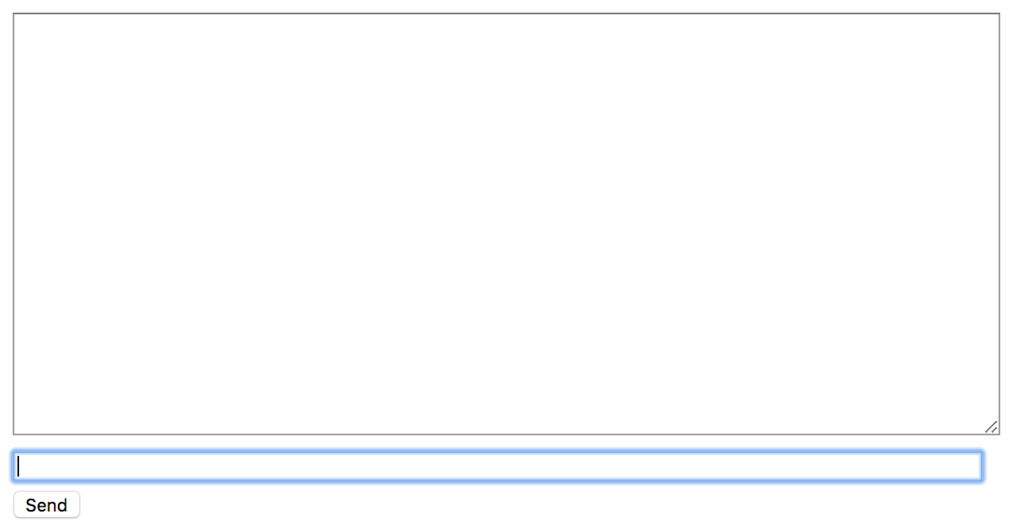
以下の様なページが表示されます.

またコンソールに下記の様なエラーが出ます.これは想定内のエラーです.
[2018/05/11 00:04:55] HTTP GET /chat/lobby/ 200 [0.03, 127.0.0.1:63086]
2018-05-11 00:04:55,440 - ERROR - ws_protocol - [Failure instance: Traceback: <class 'ValueError'>: No application configured for scope type 'websocket'
/Users/pudding/ghq/github.com/pddg/channels_tutorial1/env/lib/python3.6/site-packages/twisted/internet/defer.py:500:errback
/Users/pudding/ghq/github.com/pddg/channels_tutorial1/env/lib/python3.6/site-packages/twisted/internet/defer.py:567:_startRunCallbacks
/Users/pudding/ghq/github.com/pddg/channels_tutorial1/env/lib/python3.6/site-packages/twisted/internet/defer.py:653:_runCallbacks
/Users/pudding/ghq/github.com/pddg/channels_tutorial1/env/lib/python3.6/site-packages/twisted/internet/defer.py:1442:gotResult
--- <exception caught here> ---
/Users/pudding/ghq/github.com/pddg/channels_tutorial1/env/lib/python3.6/site-packages/twisted/internet/defer.py:1384:_inlineCallbacks
/Users/pudding/ghq/github.com/pddg/channels_tutorial1/env/lib/python3.6/site-packages/twisted/python/failure.py:422:throwExceptionIntoGenerator
/Users/pudding/ghq/github.com/pddg/channels_tutorial1/env/lib/python3.6/site-packages/daphne/server.py:186:create_application
/Users/pudding/ghq/github.com/pddg/channels_tutorial1/env/lib/python3.6/site-packages/twisted/python/threadpool.py:250:inContext
/Users/pudding/ghq/github.com/pddg/channels_tutorial1/env/lib/python3.6/site-packages/twisted/python/threadpool.py:266:<lambda>
/Users/pudding/ghq/github.com/pddg/channels_tutorial1/env/lib/python3.6/site-packages/twisted/python/context.py:122:callWithContext
/Users/pudding/ghq/github.com/pddg/channels_tutorial1/env/lib/python3.6/site-packages/twisted/python/context.py:85:callWithContext
/Users/pudding/ghq/github.com/pddg/channels_tutorial1/env/lib/python3.6/site-packages/channels/staticfiles.py:41:__call__
/Users/pudding/ghq/github.com/pddg/channels_tutorial1/env/lib/python3.6/site-packages/channels/routing.py:58:__call__
]
Exception in callback AsyncioSelectorReactor.callLater.<locals>.run() at /Users/pudding/ghq/github.com/pddg/channels_tutorial1/env/lib/python3.6/site-packages/twisted/internet/asyncioreactor.py:287
handle: <TimerHandle when=253833.004511811 AsyncioSelectorReactor.callLater.<locals>.run() at /Users/pudding/ghq/github.com/pddg/channels_tutorial1/env/lib/python3.6/site-packages/twisted/internet/asyncioreactor.py:287>
Traceback (most recent call last):
  File "/usr/local/var/pyenv/versions/3.6.0/Python.framework/Versions/3.6/lib/python3.6/asyncio/events.py", line 126, in _run
    self._callback(*self._args)
  File "/Users/pudding/ghq/github.com/pddg/channels_tutorial1/env/lib/python3.6/site-packages/twisted/internet/asyncioreactor.py", line 290, in run
    f(*args, **kwargs)
  File "/Users/pudding/ghq/github.com/pddg/channels_tutorial1/env/lib/python3.6/site-packages/twisted/internet/tcp.py", line 289, in connectionLost
    protocol.connectionLost(reason)
  File "/Users/pudding/ghq/github.com/pddg/channels_tutorial1/env/lib/python3.6/site-packages/autobahn/twisted/websocket.py", line 128, in connectionLost
    self._connectionLost(reason)
  File "/Users/pudding/ghq/github.com/pddg/channels_tutorial1/env/lib/python3.6/site-packages/autobahn/websocket/protocol.py", line 2467, in _connectionLost
    WebSocketProtocol._connectionLost(self, reason)
  File "/Users/pudding/ghq/github.com/pddg/channels_tutorial1/env/lib/python3.6/site-packages/autobahn/websocket/protocol.py", line 1096, in _connectionLost
    self._onClose(self.wasClean, WebSocketProtocol.CLOSE_STATUS_CODE_ABNORMAL_CLOSE, "connection was closed uncleanly (%s)" % self.wasNotCleanReason)
  File "/Users/pudding/ghq/github.com/pddg/channels_tutorial1/env/lib/python3.6/site-packages/autobahn/twisted/websocket.py", line 171, in _onClose
    self.onClose(wasClean, code, reason)
  File "/Users/pudding/ghq/github.com/pddg/channels_tutorial1/env/lib/python3.6/site-packages/daphne/ws_protocol.py", line 146, in onClose
    self.application_queue.put_nowait({
AttributeError: 'WebSocketProtocol' object has no attribute 'application_queue'
ブラウザのコンソールにも下記の様なエラーが出ているかと思います*1.
WebSocket connection to 'ws://127.0.0.1:8000/ws/chat/lobby/' failed: Error during WebSocket handshake: net::ERR_CONNECTION_RESET
Consumerを書く
DjangoがHttpリクエストを受け,urlの設定を元にview関数を呼び出してリクエストを処理するように,channelsはWebSocketのコネクションを受け入れると,consumerを呼び出しイベントを処理します.
今回は非常に簡単な,送られてきた文字列をオウム返しするだけのconsumerを作成します.
chat/consumers.pyを作成します.
from channels.generic.websocket import WebsocketConsumer
import json

class ChatConsumer(WebsocketConsumer):
    def connect(self):
        self.accept()

    def disconnect(self, close_code):
        pass

    def receive(self, text_data):
        text_data_json = json.loads(text_data)
        message = text_data_json['message']

        self.send(text_data=json.dumps({
            'message': message
        }))
WebsocketConsumerというそのものズバリなクラスを継承し,独自のconsumerを作成します.
receive()で送られてくるjson形式の文字列を処理して中からmessageを取り出し,またjsonに埋め込んで返します.簡単な作りです.
次にchat/routing.pyを新しく作り,以下の様に記述します.
from django.urls import path
from . import consumers


websocket_urlpatterns = [
    # 元のコードは→url(r'^ws/chat/(?P<room_name>[^/]+)/$', consumers.ChatConsumer),
    path('ws/chat/<slug:room_name>/', consumers.ChatConsumer),
]
更に,前回作成しておいたchannels_tutorial1/routing.pyも下記の様に編集します.
from channels.auth import AuthMiddlewareStack
from channels.routing import ProtocolTypeRouter, URLRouter
from chat import routing

application = ProtocolTypeRouter({
    # (http->django views is added by default)
    'websocket': AuthMiddlewareStack(
        URLRouter(
            routing.websocket_urlpatterns
        )
    ),
})
このとき,ProtocolTypeRouterはサーバへのアクセスのプロトコルを見て,websocketであればAuthMiddlewareStackに接続を投げます.
AuthMiddlewareStackはAuthenticationMiddlewareのような働きをし,認証ユーザへの参照を付与します.その後URLRouterへ渡され,これが接続するパスを見てルーティングするconsumerを決めます.
ではここで動かして確認してみます.
$ python manage.py runserver
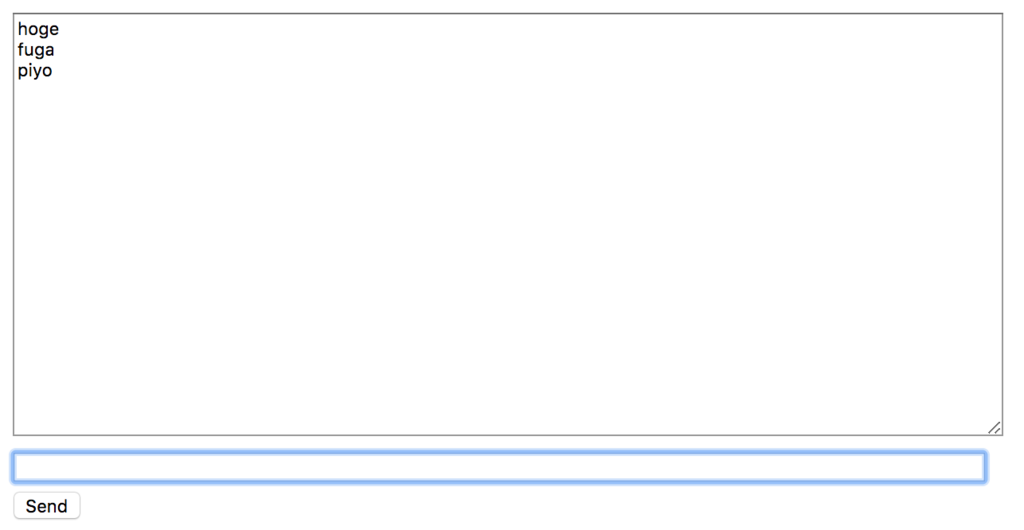
同じくhttp://127.0.0.1:8000/chat/lobbyにアクセスし,適当にメッセージを打って送ります.例ではhogeとかfugaとかpiyoとか送ったときの図です.

わーい!返ってきた〜〜〜
しかし,別のタブを開いて同じチャットルームを開いても,タブ間でのやりとりはまだできません.これを実行可能にするためにchannel layerを使用します.
channel layerを有効化する
channel layerはconsumerのインスタンスが互いに,またはDjangoのオブジェクトと通信できるようにする一種の通信システムです,channel layerは下記の様な事象を抽象化します.
- channel.メッセージボックスのようなもので,名前が付けられている.名前を持つ人はここにメッセージを送信できる.
- group.これは関連するchannelの集まりで,同じように名前が付けられている,名前を持つ人はこのgroupに自由にchannelを追加し,全てのchannelにメッセージを送信できる.
consumerインスタンスはそれぞれ一意な名前が自動生成されており,channel layerで互いに通信できるようになっています.
このchannel layerのバックエンドにRedisを使用します.チュートリアルではdockerでredisサーバを起動していますが,起動できれば何でも良いと思います*2.
$ docker run -d -p 6379:6379 redis
channelsでredisを扱うためのパッケージを導入します.
$ pip install channels_redis
settings.pyにchannel backendの設定を記述します.
CHANNEL_LAYERS = {
    'default': {
        'BACKEND': 'channels_redis.core.RedisChannelLayer',
        'CONFIG': {
            "hosts": [('127.0.0.1', 6379)],
        },
    },
}
- Redisサーバが起動
- ChannelバックエンドにRedisを指定
までできれば,簡単にコマンドラインで動作を確かめます.
$ python manage.py shell
>>> import channels.layers
>>> channel_layer = channels.layers.get_channel_layer()
>>> from asgiref.sync import async_to_sync
>>> async_to_sync(channel_layer.send)('test_channel', {'type': 'hello'})
>>> async_to_sync(channel_layer.receive)('test_channel')
{'type': 'hello'}
このとき,例えば一度receiveした後に再びreceiveすると入力されるまで待ちます(Control+Cで終了します).
確認が出来たところでconsumerを書き直し,consumerのインスタンス間で通信できるようにします.
from asgiref.sync import async_to_sync
from channels.generic.websocket import WebsocketConsumer
import json


class ChatConsumer(WebsocketConsumer):

    def connect(self):
        self.room_name = self.scope['url_route']['kwargs']['room_name']
        # 元のコードは→self.room_group_name = 'chat_%s' % self.room_name
        self.room_group_name = 'chat_{}'.format(self.room_name)

        # Join room group
        async_to_sync(self.channel_layer.group_add)(
            self.room_group_name,
            self.channel_name
        )

        self.accept()

    def disconnect(self, close_code):
        # Leave room group
        async_to_sync(self.channel_layer.group_discard)(
            self.room_group_name,
            self.channel_name
        )

    # Receive message from WebSocket
    def receive(self, text_data, **kwargs):
        text_data_json = json.loads(text_data)
        message = text_data_json['message']

        # Send message to room group
        async_to_sync(self.channel_layer.group_send)(
            self.room_group_name,
            {
                'type': 'chat_message',
                'message': message
            }
        )

    # Receive message from room group
    def chat_message(self, event):
        message = event['message']

        # Send message to WebSocket
        self.send(text_data=json.dumps({
            'message': message
        }))
cunsumerインスタンスは作成時に接続されてきたURLのパスに従ってグループに所属し,グループ内でインスタンス間のメッセージ送受信が出来るようになります.
サーバを起動して確かめます.
$ python manage.py runserver
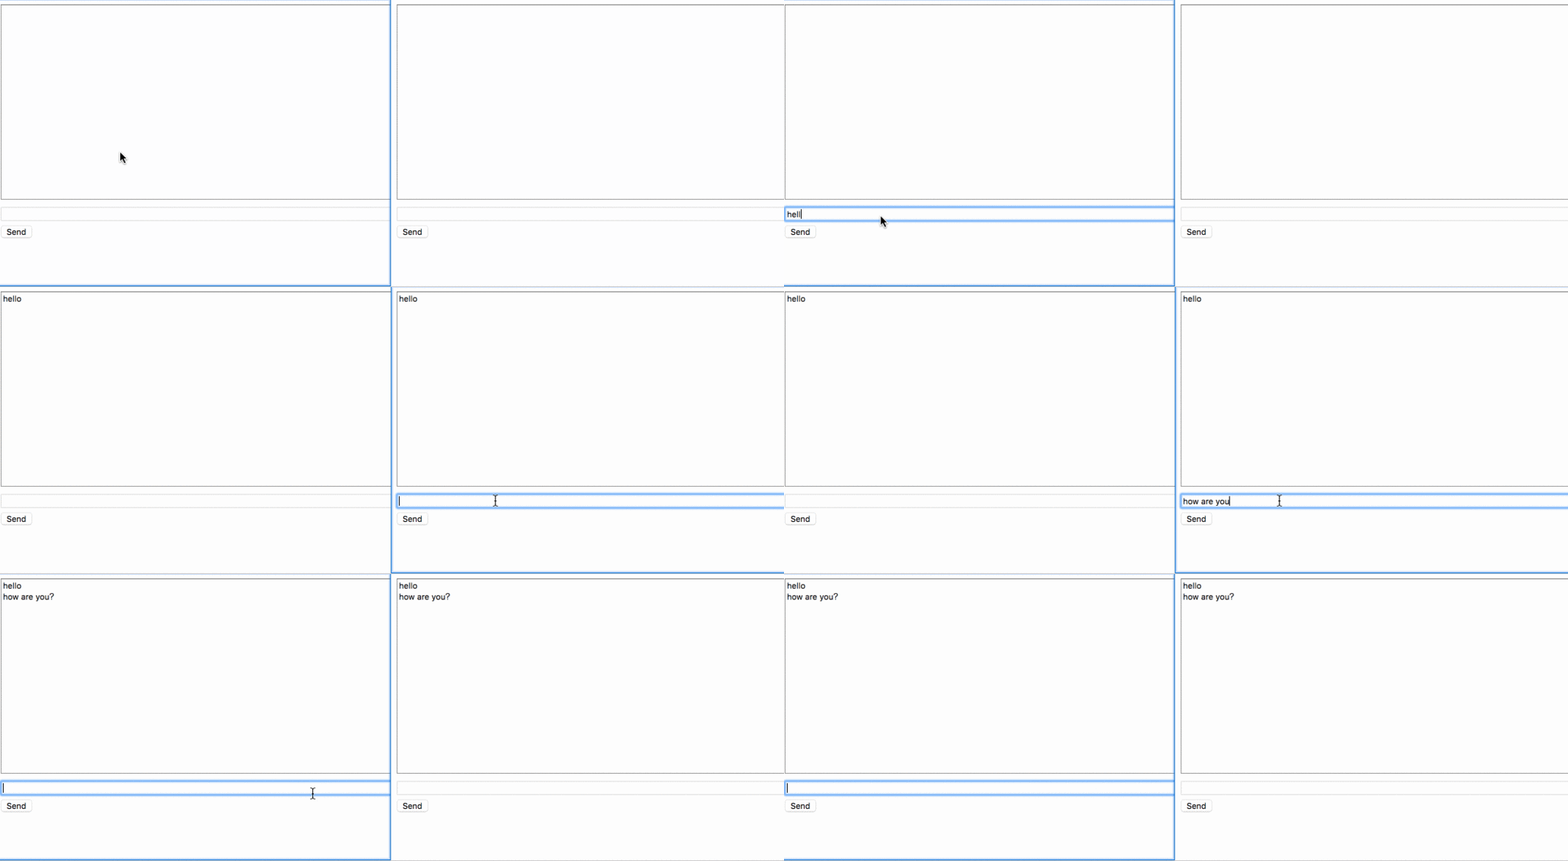
ブラウザのタブを2つ並べて開き,メッセージを送信します.どちらの画面にも応答が返ってくることが分かります.

だんだんWebSocketをやっているという気持ちになってきましたね.次はPart3です.